Happy New Year! It is freezing cold in NC today; I don't think the temp went above 30 degrees! It was a good day to stay inside and be creative. I decided to bring in the new year by making a new hat. This is maybe the cutest hat I have ever made, and definitely the smallest! So I'm calling it my Tiny Hat. It's also the quickest and easiest hat I've ever made, so I thought I would share directions as my New Year gift to you.
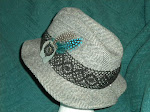
Here is what the finished hat looks like:
I snapped the picture outside in the freezing cold today, wishing it were spring! What I learned was, when tape gets cold, it no longer sticks. Zip. Nada. I tried using a tiny piece of double-stick tape to attach her hat to her hair, didn't work. I finally went inside and used a room temperature glue-dot to stick the hat to her head, no problem. But - once the tape got cold, and I tried to move the hat, that was the end of that. Here is another picture so you can see how tiny this hat really is:
As you can see, not much bigger than a penny! The actual finished size is 5/8" tall x 7/8" wide. Perfect for your teeny-tiny mice, birds, dolls, etc. Here's how I did it:
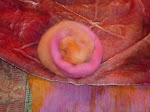
I started with a tiny wooden spool 1/2" wide x 5/8" tall. (I have these available for 25 cents if you can't find one.) I used a small piece of black Woolfelt to cover the spool. (I have this too.) The shape of the spool worked beautifully, just enough indention to look like a real top hat!
I traced a small circle onto the Woolfelt with tailor's chalk using the spool as a guide. I used a 7/8" button to trace the bottom hat brim onto the Woolfelt (I ended up using a button a bit larger than this pink one, 7/8" worked out better.) Then I measured the height of the spool, about 5/8", and used a rotary cutter and ruler to cut a strip of Woolfelt to go around the spool. I cut the strip so that it would be very snug rather than loose.
When I had everything cut out, I used a cotton swab and tacky glue to adhere the Woolfelt to the spool. I began by gluing the smaller circle to the top of the spool. Then I glued the strip around the middle of the spool. If you have cut the strip so that it's snug, the cut edges will virtually disappear once they're glued down. Last, I glued on the bottom brim. Let it dry, and it's done, how easy is that! You can also add a tiny ribbon around the bottom of the hat next to the brim if you'd like; a 1/8" wide ribbon seems to be a good size. I just think this is so adorable - and easy, my favorite kind of project! Happy New Year everybody, enjoy!


No comments:
Post a Comment