Basic instructions: place your fabric in the bottom of a large-ish container, such as a plastic bucket or large plastic coffee container. Crumple the fabric into the bottom of the container; this will add to the beautiful texture you finish with. Then pack snow on top of it, packing the snow pretty firmly. Next add your dye to the top. You can use more than one color for added excitement. Keep in mind how the colors might mix; red and green will make brown, as will blue and orange, so you might want to go with analogous colors such as teal and lime, or blue and yellow, which will make green when mixed. I mix the dyes fairly concentrated, or if using powdered dye, you might try just sprinkling the powder on top. Some dyes will even separate into different shades of colors; for example, purple Wilton's icing gels separate into gorgeous hues of lavender, blue and pink.
This was some silk habotai I snow-dyed with Wilton's purple icing gels, mixing a small amount of the gel with a half cup of water and 2 tablespoons of white vinegar, then pouring it onto the snow.
Once you have added the dye, you just wait for the snow to melt and the dye to slowly trickle down onto the fabric, leaving a lovely icy texture. You might want to move the container to a semi-warm area like your garage or basement to facilitate the melting. Then pour the dye off. Be sure to heat-set as necessary.
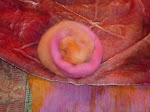
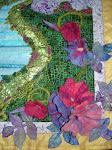
The fabric came out so pretty! I combined it with some wool I marbled to make a simple kimono-style jacket like my #220 "Cut-up Kimono Jacket" pattern, shortening the jacket body and sleeves to fit my fabric. I had the nuno-felted scarf that matched perfectly, and the little rose flower is from my #209 "Wooly Flower Basket & Wall Hanging" pattern. The tote bag was one of my samples I did for my "Marbling on Wool" article for Quilting Arts magazine last year.
Another technique for more specific texture and color is to use a grill and a pan to catch your melted dye. For the purple and blue textiles shown, I placed a grill or screen over a large roasting pan. I wt my fabric, then fan-folded it into diagonal pleats radiating from one corner, then pleated this down from the corner to fit my grill. I then piled snow onto the fabric, added my dye in ombre shades of blue and purple, and let the snow melt.
This was cotton fabrics I dyed with Procion dyes, I used 5 rectangles and some strips to fussy-dye fabric to make my #212 "Quick & Easy Ladies' Vest" pattern.
My finished snow-dyed fabrics!
Close-up, can you see the cross in the pattern? Dyeing is so serendipitous, you never know what you're going to get!
My "Quick & Easy Ladies' Vest" pattern #212
There are so many fun things you can do with snow-dyeing! Hmm...I wonder what I'll try next, with 8" of snow and it's still coming, it's a perfect day to try a new technique!
