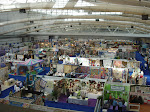
I'm preparing for my fashion show September 14 at the PA National Quilt Extravaganza at the Oaks, and getting so excited as the time draws near! I hope to bring a positive message of unity and acceptance of one another, and inspire each attendee and model to soar in their creativity and outlook on life and themselves. I am so inspired by not only nature, but the art of the masters, and one of my favorite artists is Gustav Klimt. I love the color, beauty, and exuberance in his work! And so naturally, in my fashion show "Celebrating Art and Fashion", I had to include an ensemble that was inspired by his art.
This was my inspiration painting! I love her dress, scarf and hat, and the happy colors and shapes in the background. I knew I could make a pretty ensemble inspired by Adele's, and I knew a lovely young lady from my church that looked so much like Klimt's model. The background, however, was a bit more of a challenge!
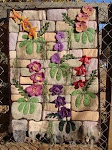
I dug into my stash, and found the perfect colors for the background. I also found this great leaf print fabric; there was no way I was going to try to duplicate Klimt's artsy images from the top of his print!
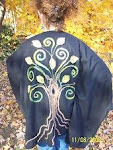
I pressed a fusible web (I like to use Pellon Wonder-under) to the wrong side of my cotton leaf fabric. Then I cut out the leaf shapes and fused them to National Nonwovens Woolfelt, shown in the lower left corner. I then cut around the leaf shapes, leaving a 1/8" margin around the perimeter of the leaves. I love using this "no-fray" technique, and have used it a lot in my wall hangings!
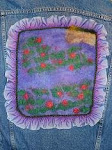
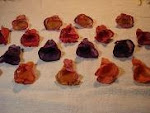
Next to tackle the middle and "floor" of the background. I knew the perfect friend from the Art Tarts group to help me! Pat has such an artsy edge and eye for color, and agreed to help me in this project. We spent the day cutting out flowers and circles and gluing them together. Then, with the help of my mom, I sprayed Aleene's Tacky Spray on the backs of every applique; that way, they would be movable (and in the end, removable too.) It was quick, easy, and now I can use my background fabrics later for other projeccts! The Woolfelt was a lifesaver too, no fraying and gorgeous colors.
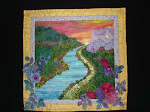
The "floor" of the background with funky applique shapes!
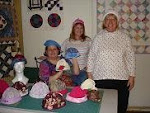
My next quest was to find a venue to set up for the photo shoot. Amanda from my church generously agreed to let us do it in the back of her beautiful shop, Blush in downtown Kernersville! I couldn't resist taking a few pictures of her gorgeous store, she has some awesome clothes and accessories!


I was also thrilled that Morgan agreed to be my model for the photo! I finished the ensemble which consisted of the dress (instructions on how to make the dress included below), hat (made from my #166 "Sun 'n Fun Hat" pattern in Black 100% Woolfelt), and scarves (samples from my silk scarf-dyeing classes), we met at Blush and set up for the photo shoot. Thank goodness we had lots of room for lights etc.; but my photo did need a little editing help with the background. Hooray for my daughter Maxi to the rescue! She helped tweak the lighting and borders, and made the photo a little more professional. And beautiful Morgan did a fantastic job modeling with her sunny smile, you can't hide her joy and happiness! Here are some of our finished shots, and yes, I do plan to wear this outfit in the future!
Morgan looked gorgeous in this ensemble, I really love the hat on her!
Beautiful Morgan with her infectious smile!
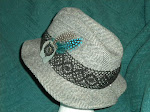
Morgan's hat, made of 100% black Woolfelt rom my pattern #166 "Sun 'n Fun Hat". I added a bit of lace to the front brim and tied my marbled silk scarf from my scarf-dyeing class around the center band. The resist-dyed scarf at the bottom is also from this class. I really love this hat! And it's super easy to make, only 3 pattern pieces. The 100% Woolfelt really helps it hold its shape too, although I did add a fusible interfacing as well.
The dress was also easy to make! Most folks know I am all about quick 'n easy, and this dress is no exception. I started with a white linen shirt and several harmonizing prints of lightweight dress fabrics, silks and drapey polyesters. I used a 12" x 8-1/2" ruler to cut lots of squares, which I then sewed together to make a skirt of 27 rectangles: 3 long rectangles long, x 9 rectangles wide.
As you can see, I had a nice variety of prints in different sizes, shapes, and coordinating colors. Kind of like a quilt! I matched up the seams pretty well, but the good thing about prints? Camouflage!
I tried on my white linen shirt and marked where I wanted the waist seam to fall. Then I gathered up the upper edge of my patchwork skirt and sewed it right sides together to the shirt. I did have to add a placket (shown below), and I used the same technique you would use for a man's shirt cuff placket, leaving one of my center front skirt seams open for the top 6", and sewing a 1-1/4" placket there (so I could just slide the dress on when the shirt was unbuttoned.) Once that was done, I trimmed off the extra shirt fabric (shown above) and finished off the seam.
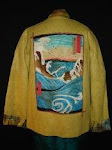
I then found the perfect trim at our local Joann's fabric store, doesn't this look like the original Klimt picture? I hemmed the lower edge of the skirt and sewed this great black trim on top.
So, at that point the basic dress was done, and it was easy-breezy comfy! But - it needed the belt. I had the perfect fabric in my stash, a beautiful rich royal blue brocade, I just needed a belt buckle. Keeping in mind that I had requested models of all shapes and sizes for my fashion show, I wanted something easy to make but adjustable. So I headed to the thrift store to see what kind of buckles I might find there.
I found exactly what I was looking for, an oversized d-ring buckle on a ready-made belt. I cut that baby off, cut a long sash of my blue fabric 9" wide x 48" long, and sewed up a belt with a slightly diagonal end. Then I sewed the other end to my d-rings, and, voila! The perfect belt to accent any girl's waist.
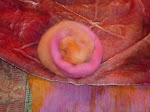
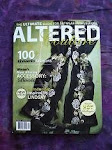
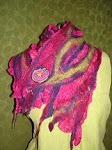
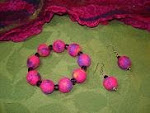
The last thing my ensemble needed was some jewelry. I remembered a wet-felted wool bead necklace I had made for a magazine a few years ago with an abalone shell pendant, it gave just the right look to my finished outfit! And these gorgeous shell earrings hand-made by my friend Ileana of Maleku Jewelry in Greenville, NC added the perfect finishing touch!
So, I hope you'll try your hand at making a dress from an upcycled shirt and some fabric squares! I can see so many possibilities in this: wouldn't some batik rayons be beautiful in some autumn colors, maybe with a knit shirt? And don't forget the hat on those cool autumn days, my "Sun 'n Fun Hat" #166 is quick 'n easy to make!
I'll also be teaching a "Marbling on Wool" class at the PA National Quilt Extravaganza September 15, and silk scarf-dyeing at Sawtooth School of Visual Art in NC December 9 as well as Houston Quilt Festival November 3 with lots of these great techniques!
Hope to see you at my fashion show in PA on September 14 or at a class in the future!


No comments:
Post a Comment