I've been working on a new folk-art design, something a bit more traditional with some snappy new techniques for my woolfelt. Usually I do my handwork with a size 5 pearl cotton, the thickness of this wt. thread pairs nicely with the beefy woolfelt in applique for blanket-stitch etc. But for this piece, I'm using a finer size 8 or 12 pearl cotton in variegated colors. I have some beautiful colorways in these sizes, but I needed a solid black for part of the design. I called our local needlework shop, no luck. Living in a small town, no one else within a 40 minute drive carries any sort of pearl cotton, and of course, I need it today. Finally it dawned on me, silly girl, it's solid black, just dye it yourself! Now I've never dyed thread, and all I could think of was the occasional mess I've had when unwinding those skeins and I get in too big of a hurry. I could just see that happening to my thread during the dyeing process. Not sure how the pro's do it, but here's a simple technique that worked for me.
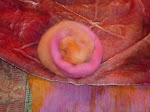
First I thought, I need to wind it around something so the thread doesn't get all tangled up. I thought about a wooden dowel rod, but I was afraid it would be all curly. Then I remembered the wheels I use for my pincushion bases. I found a 2-1/2" wheel (from my "Ms Delia's Dress Shoppe" kits) that was a second, my lucky day! It had a little split going up one side, just like the little notch at the top of a thread spool. I measured off about 4 yds. of a dark variegated pearl cotton that had areas of tan in it, folded it in half twice, and "threaded" it onto a small bobby pin. I looped the other loose ends through the side notch of the wheel, and started winding the thread around the wheel, trying not to overlap as I passed through the center hole. When I reached the end I clipped the loops holding the bobby pin on and looped them through the same side notch.
I had some black Rit dye already mixed up in a jar, so I pulled out a plastic bowl (in this case a Cool Whip container) and poured the dye into the bowl. I added a bit of very hot water to warm it up, then placed the threaded wheel into the bowl. Then I turned the jar upside-down to weigh it down, covering up the wheel with the dye.
.
I ran some errands for about an hour, then came back and checked my project...all black, even the wheel! I removed the jar, poured the black dye back into it, and rinsed the threaded wheel with warm water then cold. Then I pulled the thread ends out of the notch, unwound the thread and let it dry. Voila! Black pearl cotton, it worked great!
Afterward I had a thought: I bet you could use this same technique to make variegated pearl cotton too. Next time I'm going to start with white, and try a shallower dye bath and do one color (like turquoise) on one side of the wheel, then flip the wheel into another shallow dye bath of, lime green or something. Or you could do red and blue, they might be purple on the sides where they blended. Who knows? Anyway, a fun and simple technique, if anyone else tries this with some fun results please let me know! Or if you have another dyeing technique you'd like to share, I'd love to hear it too!
Subscribe to:
Post Comments (Atom)






1 comment:
I like the idea of using a wheel shaped project, easier to get the dye to soak into it.
Debbie
Post a Comment